
Discover the possible causes of your toilet’s foundation leak and how to remedy it to avoid expensive structural damage.
Everything must function as consistently as a toilet. With only the barest of care, one often lives for more than 40 years. On rare occasions, though, water will start to leak out from underneath the toilet and pour onto the floor, which can result in significant water damage. Even if you’ve never tried to repair a plumbing system, this kind of leak is simple to identify and correct.
What causes the toilet’s foundation to leak?
Usually, a broken seal under the toilet results in a leak. Learn how to install a new flexible water supply tube and wax gasket to make a watertight seal between the toilet and closet flange below.
A clear sign that the wax seal has failed is water collecting around the toilet’s base. The issue, though, may occasionally be elsewhere. Dry the toilet with a towel after soaking up the water from the floor. If you have plumbing related issues then you can look for the emergency drain unblocking in Sydney.
If you are looking for emergency drain unblocking in Sydney
Emergency drain unblocking in Sydney
Make sure the water is not dripping from a damaged tank, a loose supply tube, a defective shutoff valve, a loose supply tube, or a sweating bowl by waiting until a fresh puddle forms on the floor before checking.
also read – The top 5 Outdoor Natural Stone Pavers and Tiles
How can it be fixed?
You might be able to halt a leak under the toilet by simply tightening the closet bolts that hold the toilet to the floor. The caps protecting the bolts can be removed with a putty knife or slotted screwdriver. Then, tighten each bolt alternately, a little at a time, using a wrench. Avoid using too much force as this could shatter the toilet’s base.
Hopefully, the leak will cease. You’ll have to remove the toilet and replace the wax gasket if tightening the bolts doesn’t work.
Instructions in Steps
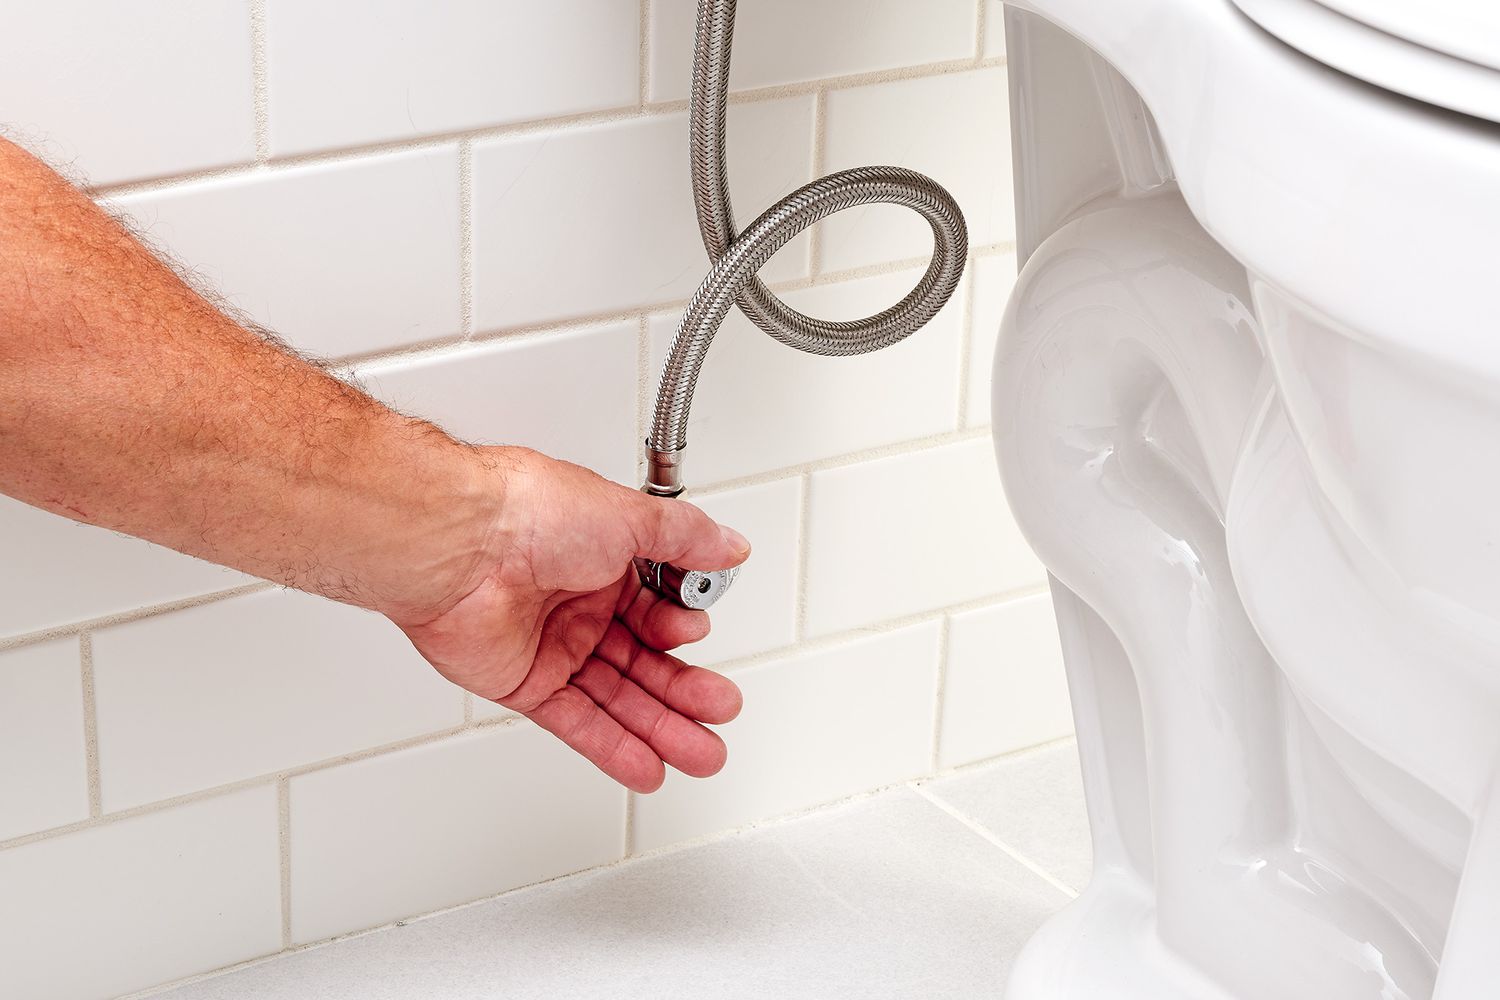
Use a wrench to detach the supply tube from the shutdown valve. Make certain that the valve is shut and the toilet is empty.
- To remove the hex nuts from the closet bolts, pry off the rounded caps covering them.
- Lift the toilet very carefully, holding it by the bowl rather than the tank, and place it on an old blanket or cardboard sheet.
- Remove all of the old wax gasket from the closet flange with a scraper. Be aware that the flange has a broken off piece.
- Once the screws holding the closet flange to the floor have been removed, slide a repair strap underneath.
- As you place the fresh wax gasket on the closet flange, centre it carefully. Note: There are two bolts for the closet.
- The threaded fill-valve shank on the bottom of the toilet tank is where the new water supply tubing should be attached.
- To compress the gasket, press down on the rim of the toilet bowl. Reapply pressure after tightening the closet bolts.
- Trim the tops of the closet bolts with a close-quarter hacksaw. Before reinstalling the caps, tighten the bolts.
- To the shutdown valve, attach the supply tube. Once the valve is opened, flush the toilet and look for leaks.
Inquiry Regarding Caulk
Regarding whether to caulk around a toilet’s base, there has been a protracted discussion in the plumbing community. Since the caulk would likely hide any leaks, the majority of plumbers don’t.
To prevent bacteria from forming in the joint around the toilet, some municipalities’ local building codes, however, mandate that householders caulk the area.
The code requirements in your town can be found by contacting your building department. If you choose to caulk, make sure you pick a tub and tile caulk that is of excellent quality and resistant to mildew.